Leaking Washing Machine Valve in a Condo? What It Really Means
Leaking washing machine shutoff valve in a condo or apartment? Learn how urgent it is, what to do right now, and how repairs and building water shutoffs usually work.
“My Washing Machine Valve Is Dripping – How Urgent Is This?”
We recently got a call from a customer — let’s call her Emily — who sounded a little worried. She told us, “There’s a drip of water coming out from the washing machine valve. I’m not sure if it has to be fixed right away or if it can wait.” On top of that, she lives in a mid-rise condo building, so she was also thinking about building rules, water shutoffs, and potential neighbor issues.
We walked Emily through what was happening, what to watch for until a plumber could get there, and how condo plumbing and shutoffs usually work. We have this conversation a lot, so we thought we’d share the same guidance we give our own customers when their washing machine shutoff valve starts leaking.
How to Tell If Your Washing Machine Shutoff Valve Is Leaking
When we’re on the phone with someone like Emily, we start with a quick “at-home inspection” they can do safely:
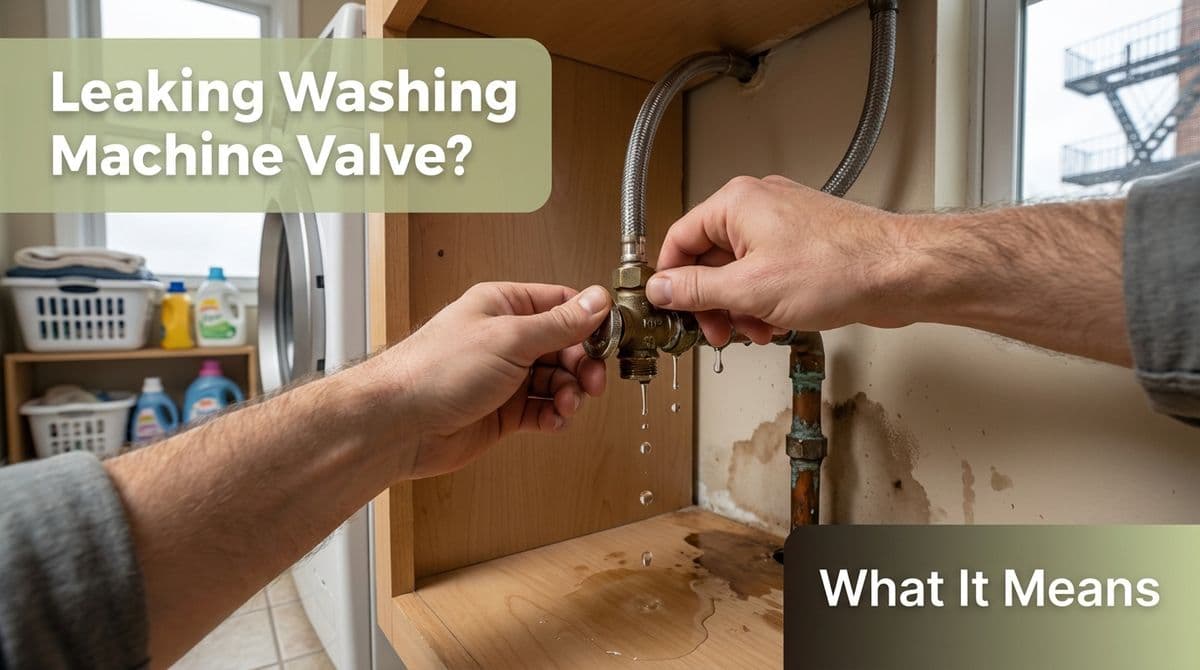
- Look directly at the valve handles: These are usually the hot and cold knobs or levers above or behind the washer. Is water forming around the stem, handle, or body of the valve?
- Check the connection to the hoses: Sometimes it looks like the valve is leaking, but the drip is actually coming from the hose connection or a loose washer.
- Watch for a steady drip vs. occasional moisture: A slow, consistent drip from the valve itself (even with the washer off) usually means the valve is failing internally.
- Feel the wall or cabinet around the valve: If it’s damp, swollen, or soft, the leak may have been going on longer than you realized.
If you’re seeing a consistent drip right off the valve body or stem, that’s the situation Emily was describing to us — and that’s when it’s time to plan a repair.
How Urgent Is a Dripping Washing Machine Valve?
We’re honest with customers: a very slow drip from a valve is usually not a “call 911 right now” emergency, but it is something you should treat as urgent within a few days, especially in a condo or apartment.
Here’s how we help people think about the urgency:
- Small, contained drip into a pan or bucket: Often safe to schedule within the next few days, as long as you’re actively catching the water and checking it.
- Drip you can’t fully control, or wet drywall/flooring: We recommend sooner rather than later. At that point you’re risking hidden damage.
- Any sign of water reaching a neighbor’s unit: That’s truly urgent. We advise contacting building management and a plumber immediately.
With Emily, her leak was a slow drip that she could catch, and her unit had its own individual shutoff. We told her it was important, but not a middle-of-the-night emergency. We scheduled her for the earliest slot we had and walked her through what to do in the meantime.
Risks of Delaying a Valve Repair in Condos and Apartments
When we talk to condo and apartment owners, we always explain that even a small leak can have big consequences in a multi-unit building:
- Water damage to walls and floors: A slow drip behind the washer can soak drywall, baseboards, and subflooring before you realize it. By the time stains appear, the damage is often already done.
- Mold growth in tight laundry closets: Laundry closets are usually warm and poorly ventilated — perfect conditions for mold if things stay damp.
- Damage to units below you: Water loves to travel. A small leak from your laundry area can show up as a ceiling stain or sagging drywall in the unit below.
- Complaints and liability: In multi-unit buildings, leaks often trigger building management involvement, insurance claims, and sometimes responsibility for neighbor repairs.
This is why we encourage owners like Emily not to ignore a leaking washing machine valve, even if the drip seems harmless.
Temporary Steps You Can Take While You Wait for Service
When someone calls us with a leak like this, we walk them through a few simple, temporary steps to reduce risk until we arrive:
- Turn off your unit’s main shutoff (if you have one): Emily had an individual unit shutoff, so we confirmed where it was and had her close it if she wasn’t actively using water. This stops pressure to the valve.
- Turn the washing machine valves fully off: Sometimes a valve that’s partially open drips more. Fully closing them can slow or stop a minor leak, though a truly failed valve may still drip.
- Catch drips in a container: Place a bowl, small bucket, or tray under the leak and check it regularly. Empty it before it fills.
- Protect surrounding materials: Use a towel or waterproof mat under and behind the washer to protect flooring, but don’t cover vents or block air circulation.
- Avoid using the washer if the leak worsens: If you notice the drip increases when the washer is running, we suggest pausing laundry until the valve is repaired.
We also encourage customers to take a couple of photos of the valve area and text or email them to us. That helps us plan for the right replacement parts before we come out.
Why Multi-Unit Buildings Often Need a Building Water Shutoff
During our first conversation, we asked Emily a key question: “Do you have your own individual water shutoff, or does the building need to shut down water for your stack?” The answer determines how we schedule the job.
Here’s how we typically see it in condos and apartments:
- Individual unit shutoff: Best case. We can isolate your unit without affecting neighbors. In situations like Emily’s, we can usually book you like any other service call.
- Stack or building-level shutoff only: The building may need to shut water off to multiple units. That usually requires coordination with management, set time windows, and advance notice to neighbors.
When there’s no individual shutoff, we often work directly with property managers or HOAs to:
- Confirm which valves control your unit or vertical stack
- Schedule a shutoff window (often 1–3 hours)
- Make sure notices go out to affected residents
If you’re not sure what kind of shutoff you have, we usually ask you to look in a few common places (laundry closet, water heater area, under the kitchen sink, or in a corridor closet) and describe what you see. Photos help us a lot here too.
How We Inspect, Test, and Replace a Leaking Valve
When we arrive at a job like Emily’s, we follow a fairly standard process:
- Confirm the leak source: We dry everything off, then slowly pressurize the lines and watch where water appears — around the valve stem, the body, or the hose connection.
- Inspect for hidden damage: We look for swollen drywall, peeling paint, soft baseboards, or staining on the wall or floor. In some condos, we also check the ceiling below if accessible.
- Shut down and drain the line: We close the appropriate shutoff (unit or building), then relieve pressure and drain water from the valve and hoses.
- Remove and replace the valve: Depending on what’s installed, we may swap out a traditional hose bib-style valve for a more modern quarter-turn ball valve for better reliability.
- Pressure test and check for leaks: Once the new valve is in, we slowly turn the water back on, test in both open and closed positions, and run the washer to ensure everything stays dry.
Afterward, we review what we found with the homeowner and point out any areas to monitor over the next few days.
What We Typically Charge and How Scheduling Works
While every company structures pricing differently, we’re upfront about how we handle it. For a straightforward washing machine shutoff valve replacement in a typical residential setting, we usually quote:
- Service call and labor: Around $215 for the visit and labor time, billed on a time-and-materials basis.
- Parts: Another $40–$60 for the valve itself, depending on style and quality.
So we generally advise customers to plan on roughly $250–$260 for a standard valve replacement, similar to what we discussed with Emily. If your setup is more complex, or we find additional issues (like corroded piping that needs repair), we’ll walk through that before proceeding.
Scheduling-wise, non-emergency condo work usually looks like this:
- With individual unit shutoff: We can often fit you into our regular schedule within a few days.
- With building or stack shutoff: Timing depends on your building’s rules and availability for a water shutdown. We coordinate with management as needed.
Signs of Hidden Water Damage to Watch For
Even after we’ve fixed the leak, we talk with customers about what to monitor in the days and weeks that follow, especially in multi-unit buildings:
- Discoloration or bubbling paint: Yellow or brown stains, peeling, or bubbling paint near the laundry area can indicate past or ongoing moisture.
- Soft or warped baseboards and flooring: Wood or laminate that’s curling, buckling, or soft underfoot is a red flag.
- Musty odors: A persistent musty smell in the laundry closet may point to moisture hidden behind walls.
- Ceiling spots in units below: If you’re in a condo, keep communication open with neighbors below you. New stains on their ceiling might be connected.
If you notice any of these, we recommend taking photos, notifying building management if you’re in a condo, and considering a follow-up inspection or a consult with a water damage or remediation professional.
How to Prevent Future Valve Leaks in Condos and Apartments
We always prefer helping you avoid the next leak. Here are a few tips we share with our customers in multi-unit buildings:
- Exercise the valves once or twice a year: Gently turn your hot and cold washing machine valves fully off and on. Valves that never move tend to seize and fail.
- Inspect hoses and connections: While you’re at it, check your washer hoses for bulges, cracks, or corrosion at the fittings. Consider braided stainless-steel hoses for added protection.
- Know your unit shutoff locations: Make sure everyone in your home knows where the main unit shutoff is and how to turn it off quickly.
- Use a drain pan if possible: In some condos, a washer pan connected to a drain is allowed and can catch small leaks before they spread.
- Schedule proactive upgrades: If your valves are very old or hard to turn, we can replace them before they fail.
What We Ask You to Gather Before We Arrive
When you call us about a leaking washing machine valve, we’ll typically ask you for a few details so we can be as prepared as possible:
- Type of home: Condo, apartment, or single-family house.
- Shutoff situation: Whether you have an individual unit shutoff or need building/management help.
- Photos of the valve area: A couple of clear pictures of the valves, hoses, and any visible damage.
- How long it’s been leaking: And whether the drip gets worse when the washer runs.
- Any building rules for contractors: Required working hours, insurance documentation, or check-in procedures.
The more we know up front, the smoother the visit will go — for you, for us, and for your neighbors.
If your washing machine shutoff valve is dripping like Emily’s was, don’t panic — but don’t ignore it, either. Take some basic precautions, gather a few details, and reach out. We’re always happy to talk through what you’re seeing and help you figure out the best next step for your home and your building.